This day is an annual celebration of Life. This is to raise awareness of Cancer Survivors – In the U.S. alone there are over 11 million survivors, and to raise funds for Cancer Research Charities.

Word of the Day
| |||
| Definition: | (noun) Change toward something smaller or lower. | ||
| Synonyms: | decline | ||
| Usage: | The thermometer indicated a certain diminution of temperature. | ||
History
| |||
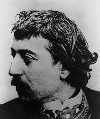 | First a sailor and then a successful stockbroker in Paris, Gauguin took up painting on weekends when he was in his mid-20s. Eventually, with the encouragement of Impressionist painter Camille Pissarro, he devoted himself completely to art, quitting his job and separating from his wife and five children. Today, he is recognized as a highly influential founding father of modern art whose bold experiments with color led directly to the Synthetist style. | ||
| |||
| If humans are ever going to visit Mars, NASA must consider how it will transport astronauts across millions of miles of space. But the final few miles of that journey may be the most volatile. "Anytime we land on Mars, there's a lot of really complicated things that have to happen," explained Ian Clark of NASA'S Jet Propulsion Laboratory, during an interview. | |||
 | |||||||
The science behind NASA’s ‘flying saucer’ test
If humans are ever going to visit Mars, NASA must consider how it will transport astronauts across millions of miles of space. But the final few miles of that...
| |||||||
1775 - The United Colonies changed their name to the United States.
1892 - John Joseph Doyle became the first pinch-hitter in baseball when he was used in a game
1903 - Professor Pierre Curie revealed the discovery of Polonium.
1909 - Mary Pickford made her motion picture debut in "The Violin Maker of Cremona."
1937 - The cover of "LIFE" magazine showed the latest in campus fashions of the times, which included saddle shoes.
1955 - "The $64,000 Question" premiered.
1966 - Sony Corporation unveiled its brand new consumer home videotape recorder. The black and white only unit sold for $995.
1968 - Legoland Billund opened in Billund, Denmark. It was the original Legoland park.
1972 - The musical "Grease" opened on Broadway. It had been playing off-Broadway for about 4 months.
1976 - "The NBC Nightly News", with John Chancellor and David Brinkley, aired for the first time.
1982 - Elvis Presley's Graceland mansion in Memphis, TN, opened as a tourist attraction.
1993 - Prince changed his name to an unpronounceable symbol (
DAILY SQU-EEZ

If You Were Born Today, June 7:
You have strong business instincts which can aid you in your worldly goals, but you also possess a distinct spiritual side which you share only with those very close to you. Some might call you lucky, but in truth, you make your own luck. You can be a tad stubborn and this quality can make relationships challenging, especially as you tend to attract the same quality in others. Famous people born today: Paul Gauguin, Dean Martin, Jessica Tandy, Liam Neeson, Prince, Anna Kournikova.
| Picture of the day | |
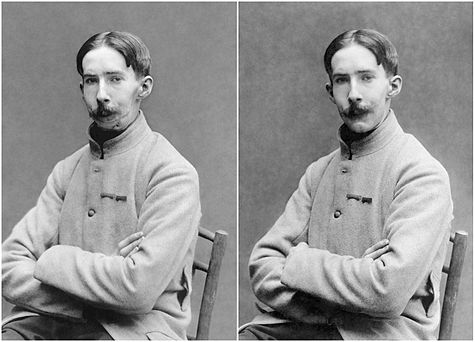 | |
Before (left) and after pictures of a French soldier who was fitted with a craniofacial prosthesis by the Red Cross. Such prostheses help rehabilitate those with facial defects caused by disease, trauma, or birth defects. They are designed to be as similar as possible to the natural anatomy of each individual, covering, protecting, and disguising facial disfigurements or underdevelopments.
| |

Islands in the Sea
Photograph by Mary E. Mackey
Sunlight paints a rock formation in the Galápagos Islands. Cruise passenger Mary E. Mackey was relaxing on deck after a shore excursion when she noticed the evening light. Not having her 35mm camera with her, Mackey captured the image with her iPhone. “I didn’t want to miss this opportunity,” she writes.
knit
 | |||||||
Choo-Choo Summer Shell pattern by Cathy Campbell
Choo-Choo by Crystal Palace Yarns Sport / 5 ply 52% Rayon, 30% Polyester, 18% Nylon 92 yards / 50 grams average rating from 17 votes 47 projects, st...
| |||||||
knit, 6 - 24 mths
 | |||||||
Preview by Yahoo
| |||||||
knit
 | |||||||
Knubbelchen pattern by pezi888
…kann kuscheln, trösten, Mut machen oder einfach ein Lächeln aufs Gesicht zaubern…
| |||||||
Preview by Yahoo
| |||||||
knit
 | |||||||
Koromo Top pattern by Irina Poludnenko
Gauge 18 stitches and 20 rows = 4 inches
| |||||||
knit
 Steggie Bib Copyright 2008 by Elaine Fitzpatrick.
Materials: One skein of worsted weight cotton such as Sugar and Cream or
Peaches & Crème if you are using the bib for meals. If, on the other hand, you
want to use it as a “drool” bib, try a superwash wool. The
cotton has a tendency to absorb the moisture, whereas the superwash wool will
wick the moisture and keep baby nice and dry!
Needles: Size 6
Gauge: 4.5 sts. per inch, not critical
Note: The edges of the bib are worked in a garter stitch border over the first and
last five stitches (knit every row). You might find it helpful to insert a marker
after the first five stitches and before the last five stitches.
When you reach the I-cords on the bib, it is helpful, but not necessary, to drop
down a needle size to make the cords slightly smaller.
Directions:
Cast on 15 stitches.
Row 1: p1, k1 across row.
Row 2: Cast on 3 stitches, k1, p1, across row. (18 sts.)
Row 3: Cast on 3 stitches, k1, p1 across row. (21 sts.)
Row 4: Cast on 3 stitches, p1, k1, across row. (24 sts.)
Row 5: Cast on 3 stitches, p1, k1, across row. (27 sts.)
Row 6: Cast on 2 stitches, p1, k1, across row. (29 sts.)
Row 7: Cast on 2 stitches, p1, k1, across row. (31 sts.)
Row 8: Cast on 2 stitches, p1, k1, across row. (33 sts.)
Row 9: Cast on 2 stitches, p1, k1, across row. (35 sts.)
Row 10: Cast on 2 stitches, p1, k1, across row. (37 sts.)
Row 11: Cast on 2 stitches, p1, k1, across row. (39 sts.)
Row 12: p1, k1 across row.
Row 13: p1, k1 across row.
Row 14: p1, k1 for 12 sts.; p15; k1, p1 for 12 sts.
Row 15: p1, k1 for 11 sts.; k17, p1, k1, for 11 sts.
Row 16: p1, k1 for 10 sts.; p19; k1, p1 for 10 sts.
Row 17: p1, k1 for 9 sts.; k21, p1, k1, for 9 sts.
Row 18: p1, k1 for 8 sts.; p23; k1, p1 for 8 sts.
Row 19: p1, k1 for 7 sts.; k25, p1, k1, for 7 sts.
Row 20: p1, k1 for 6 sts.; p27; k1, p1 for 6 sts.
Row 21: p1, k1 for 5 sts.; k29, p1, k1, for 5 sts.
Row 22: p1, k1 for 5 sts.; p29; p1, k1 for 5 sts.
(Note: From this point on, the first and last five stitches are the seed stitch
border. (p1, k1, p1, k1, p1 = B5) It might be helpful to place a marker for
these stitches.)
Row 23: B5; k29; B5.
Row 24: B5; p29; B5.
Row 25: B5; k1; p6; k3; p5; k3; p5; k6; B5.
Row 26: B5; p6; k5; p3; k5; p2; k5; p3; B5.
Row 27: B5; k4; p4; k2; p4; k3; p6; k6; B5.
Row 28: B5; p8; k4; p4; k3; p1; k4; p5; B5.
Row 29: B5; k5; p16; k8; B5.
Row 30: B5; p8; k15; p6; B5.
Row 31: B5; k6; p15; k8; B5.
Row 32: B5; p8; k16; p5; B5.
Row 33: B5; k4; p19; k6; B5.
Row 34: B5; p1; k25; p3; B5.
Row 35: B5; k2; p26; k1; B5.
Row 36: B5; p1; k26; p2; B5.
Row 37: B5; k1; p23; k1; p2; k2; B5.
Row 38: B5; p2; k26; p1+; B5.
Row 39: B5; k1; p25; k3; B5.
Row 40: B5; p7; k16; p2; k3; p1; B5.
Row 41: B5; k1; p2; k2; p18; k6; B5.
Row 42: B5; p6; k19; p4; B5.
Row 43: B5; k4; p19; k6; B5.
Row 44: B5; p6; k19; p4; B5.
Row 45: B5; k4; p11; k1; p3; k1; p3; k6; B5.
Row 46: B5; p6; k3; p1; k3; p1; k5; p1; k5; p4; B5.
Row 47: B5; k4; p4; k2; p4; k2; p3; k2; p1; k7; B5.
Row 48: B5; p10; k3; p2; k4; p3; k3; p4; B5.
Row 49: B5: k4; p2; k4; p4; k2; p3; k10; B5.
Row 50: B5; p11; k1; p3; k4; p10; B5.
Row 51: B5; k10; p3; k16; B5.
Row 52: p1, k1 for 6 sts.; p16; k1; p10. k1, p1 for 6 sts.
Row 53: p1, k1, for 7 sts.; k25; p1, k1 for 7 sts.
Row 54: p1, k1 for 8 sts.; p23; k1, p1 for 8 sts.
Row 55: p1, k1, for 9 sts.; k21; p1, k1 for 9 sts.
Row 56: p1, k1 for 10 sts.; p19; k1, p1 for 10 sts.
Row 57: p1, k1, for 11 sts.; k17; p1, k1 for 11 sts.
Row 58: p1, k1 for 12 sts.; p15; k1, p1 for 12sts.
Row 59: p1, k1 across row.
Row 60: p1, k1 across row.
Row 61: p1, k1 across row.
Row 62: p1, k1 across row.
Row 63: p1, k1 across 13 sts; bind off next 13 sts; work remaining stitches in
established seed stitch.
Shoulder Shaping:
Work one row even.
Working on these 13 sts, p1, k1 across row.
Dec. 1 st. at neck edge every other row 2 times. (11 sts.)
Work one row even.
Next row, dec. 1 st. at shoulder edge every other row until 5 sts. remain.
Work one row even.
Dec. 1 st. at neck edge and shoulder edge. 3 sts.
Work one row even.
I-Cord:
Slip these 3 sts. to a dpn and work an I-cord for approximately 12 inches. Fasten
off and run end down through middle of I-cord.
Join yarn to neck edge and work remaining side to correspond to other side.

crochet
 | |||||||
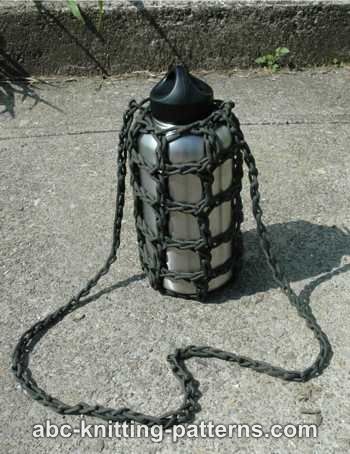
ABC Knitting Patterns - Paracord Water Bottle Carrier.
Free Crochet Bottle Carrier Pattern
| |||||||
crochet
 | |||||||
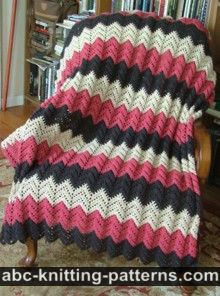
ABC Knitting Patterns - Lace Ripple Afghan .
Free Ripple Afghan Crochet Pattern
| |||||||
crochet
 | |||||||
Linen Accessory Case pattern by Pierrot (Gosyo Co., Ltd)
Direct link to pattern PDF. Pattern is Japanese but charted using standard crochet symbols. Calls for Japanese size 4/0 (2.5 mm) hook. Includes instructions...
| |||||||
Preview by Yahoo
| |||||||
crochet

crochet (you tube)
 | |||||||
FREE PATTERN, CROCHET BUTTONS pattern by Emi ...
Free tutorial here:http://www.youtube.com/watch?v=cSx4M48U36o&list=...
| |||||||
Preview by Yahoo
| |||||||

RECIPE
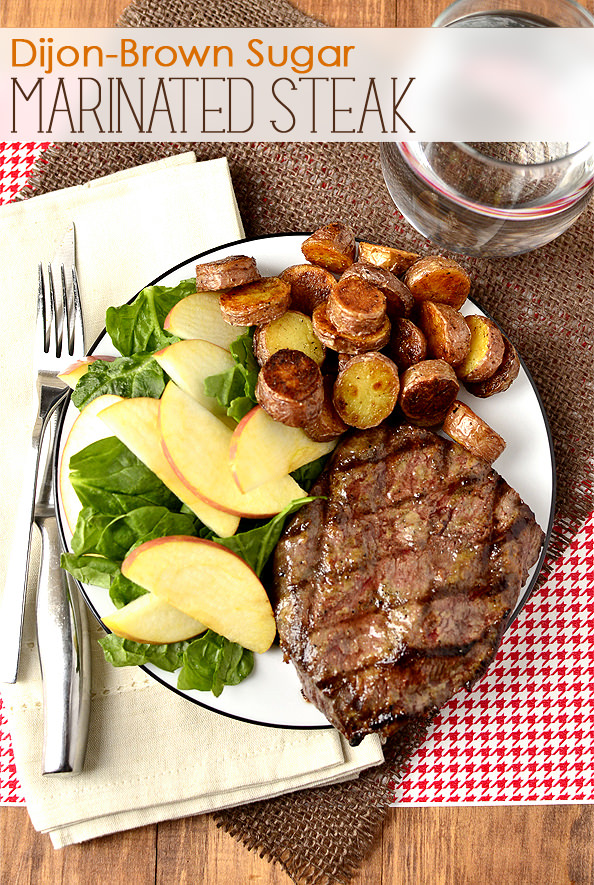 | |||||||
Preview by Yahoo
| |||||||
CROCKPOT RECIPE
stephanie o'dea
CrockPot Moroccan Chicken Recipe

I've been reading a lot of cookbooks lately, and the flavors of Moroccan food have intrigued me. I played around with ingredients I had on hand and put together a Moroccan CrockPot Chicken dish---that is good. It's not mind-blowing, but it's good. I think it needs more spice to please me, but the flavors were pronounced, and because it wasn't too spicy, I got the kids to give it a try. They particularly liked the raisins.
updated : I have since made and updated this recipe. The spices are now spot-on and are quite tasty. I'd recommend using chicken thighs instead of breast pieces--about 6 or so.
updated : I have since made and updated this recipe. The spices are now spot-on and are quite tasty. I'd recommend using chicken thighs instead of breast pieces--about 6 or so.
The Ingredients.

There are a lot. Don't freak out.
--frozen chicken pieces--the equivalent of 4 breasts
--1 cup salsa
--1/4 cup chicken broth
--2 t Tobasco sauce
--1/3 cup toasted almonds (I threw my raw almonds into the microwave for 2 minutes)
--5 cloves smashed and chopped garlic
--1/3 cup raisins (I used black, but I think golden would be better)
--2 t honey
--1 t cumin
--1/2 t cinnamon
--1/4 t chipotle chili powder
--1/2 t saffron threads
Moroccan food is traditionally served with couscous. We used quinoa.
The Directions.
Put the frozen chicken into your crockpot. If you are using fresh, this will cook awfully quickly because there isn't anything in the crock but chicken and sauce. If you are up to it, mix the spices, salsa, and broth in a separate bowl and pour evenly over the chicken. I didn't do this, and dumped everything in on top, then gave a stir when the chicken thawed a bit. Add the raisins and almonds.
Cover and cook on low for 4-8 hours. I used frozen breast tenders and because the pieces were so thin, our dinner cooked in 4 hours and was ready at noon. oops.
I served the chicken on top of saffron quinoa.
The Verdict.
I liked this, but wanted to love it. I could taste the different spices on their own, but once the chicken met the quinoa, the flavors disappeared. I think I would have liked this stuffed into a corn tortilla wrap or a pita, more than with the quinoa. When I make it again, I will increase the tobasco and the cumin. The vinegar in the tobasco gives a nice flavor that weirdly goes well with raisins. This is a recipe I could tweak and play with for quite some time.
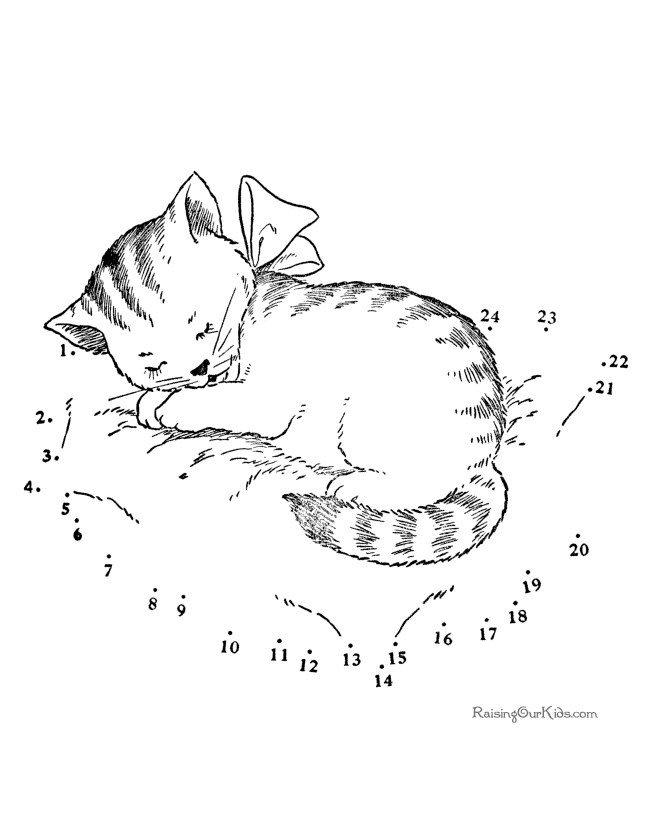
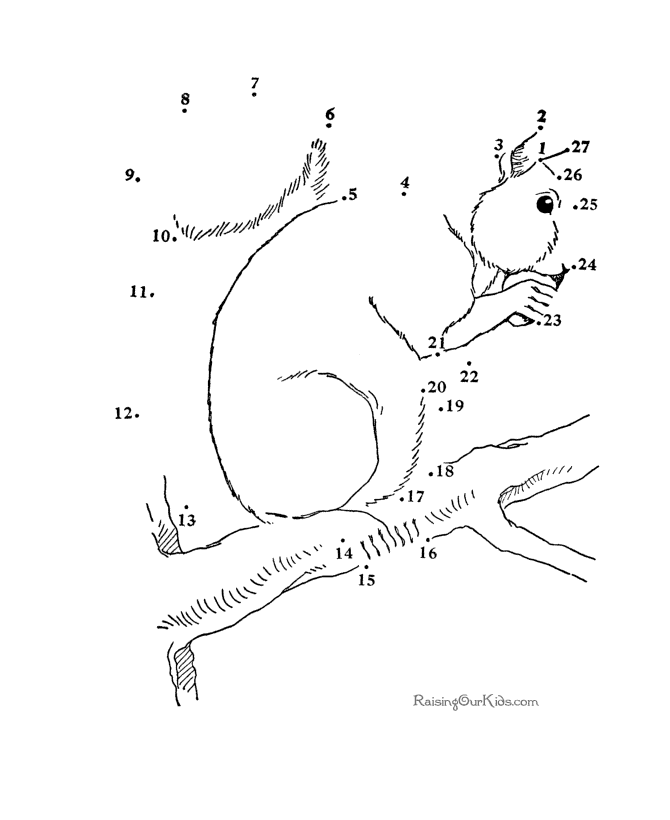
PUZZLE
CHILDREN'S CORNER ... dot to dot

CRAFT
Paper Weave
This is one of those art-projects-for-kids that can be adapted for a sophisticated look. I see these at high-end craft shows all the time. It's a perfect way to use your reject watercolor paintings or left-over papers.

 I placed a long piece of double-stick tape at the top of a piece of copy paper and put the vertical strands next to each other, then wove in the horizontal pieces.

I love putting these in large frames with big mats and small openings. It makes the artwork seem more precious.

I didn't have any old paintings so I wet a piece of white card stock, dropped food coloring on it, tilted it back and forth, ran it under the faucet again and dabbed it with a paper towel. All of this to distribute the colors. Pretty ugly, huh? Then I ran it through a paper shedder. (you will need 2 x the size of the finished product. If you want to make an 8x10, you have to make 2 of them - one for the warp and one for the weft)
 I placed a long piece of double-stick tape at the top of a piece of copy paper and put the vertical strands next to each other, then wove in the horizontal pieces.
Pretty elegant art made from food coloring - who would have guessed?
QUOTE

Scientist Volunteers as All-You-Can-Eat Buffet for Bedbugs in the Name of Science
By Sumitra
In a bid to find a remedy for bedbugs, Canadian scientist Regine Gries has spent nearly a decade studying the parasitic creatures. In fact, she is so dedicated to the project that she actually allows thousands of hungry bedbugs feast off her own blood! Thankfully, her efforts have paid off – she and her husband Gerhard have perfected a chemical that is capable of luring bedbugs away from mattresses.
Regine and Gerhard are both biologists at Simon Fraser University, just outside of Vancouver, in British Columbia. Their lab features a Plexiglass-walled colony with about 5,000 bedbug residents. The bugs live inside glass jars – about 200 to a jar – each covered with a fine mesh that’s held in place using rubber bands. And once a month for the past nine years, Regine has rolled up her sleeves, inverted the jars on to her arms, and allowed the bedbugs to reach through the mesh to bite into her skin!

"Good Morning" in Cherokee (Oklahoma & North Carolina USA) - Os-da-su-na-le
CLEVER


Who doesn’t love a fresh-smelling home? I sure do. I love using air fresheners, but the problem I’ve found with a lot of them is that they just mask the smell instead of actually eliminating it. Not this one! Not only does this air freshener neutralize bad smells, you also get to pick your own scent, and it looks adorable!
Oh yeah, and it’s made from two ingredients that you probably already have in your possession: baking soda and essential oil. Here’s how it’s done!
What you need:

For the container: a mason jar and lid, paint, paintbrush, scissors, cardstock (I used a manila folder), and a thumbtack or needle.

For the actual air freshener: baking soda and essential oil (I used peppermint).
What you do:
Trace the inner portion of the lid onto your cardstock and cut out the circle.

Using your thumbtack or pin, make a bunch of holes in the cardstock. You can make a cool design or just do it hap-haphazardly! I think mine fell somewhere in the middle of those two.


Paint one side of your cardstock, as well as the outer portion of the mason jar lid, and allow to dry. You may have to re-poke your holes after the paint is dry.

Now you’re ready to make your concoction! Fill your jar about ¼ of the way with baking soda and mix in 5-10 drops of essential oil, depending on how strong you’d like the scent to be.

Insert the cardstock circle into the painted metal ring and screw it onto your mason jar and you’re all set!

Place the jar in any room where the air needs a bit of freshening up! Give the jar a little shake from side to side every so often – you’ll be hit with the loveliest scent! For bad-smelling carpets, you can also sprinkle a bit on your carpet, wait an hour, and vacuum it up! I would love to experiment using different oils and decking out the mason jars to the point where you can’t even tell what’s inside :)
As a totally out-of-nowhere side note, this air freshener reminds me of the most adorable salt and pepper shakers I found at an adorable brunch spot in Philly called Honey’s. Subconsciously it’s probably why I chose to paint my lid teal. Look at the resemblance!
Air Freshener:

Salt and pepper shakers:


many photographs in this issue are by mark b bartosik

No comments:
Post a Comment